
Trying to capture some in-game footage of your latest killstreak on Fortnite? Or maybe you’re looking to snag some video that you can overlay some VO on later. Pics or it didn’t happen, right?
While tools like FRAPS, Snagit, and Camtasia do boast high-quality capture, you’re downloading software that’s going to cost a pretty penny. If you’re looking for good quality, intuitive video capture software that is 100% FREE you might be surprised to find that Windows 10 already has you covered.
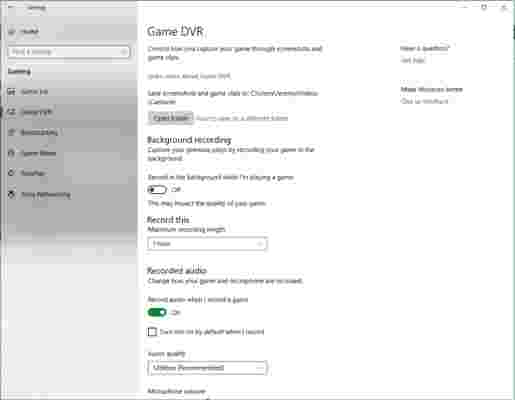
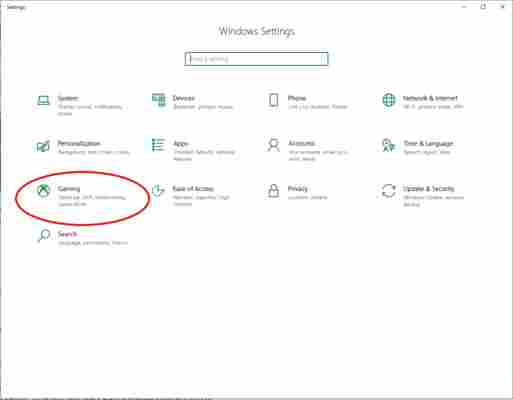
The Windows 10 OS automatically comes with Game DVR , your easy answer to start getting video immediately. It can be found right in your Settings tab under Gaming .
If you own an Xbox controller you can also open the Game Bar at any time by pressing and holding the Xbox button. Either way, it will take you to this screen :
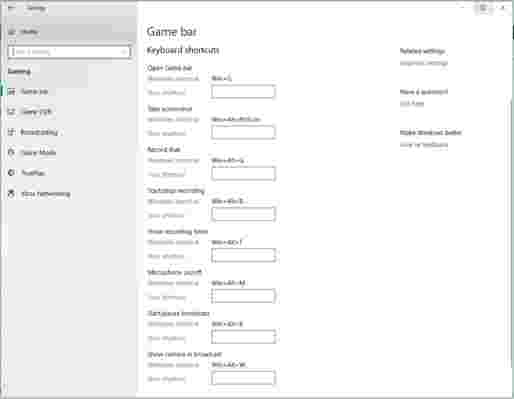
From here you have a variety of options to customize, such as which folder your video will be saved to, how long you want the recorder to capture for (anywhere from 30 minutes to 4 hours !), fps , and the video quality . You can also use Game Bar to capture screenshots , show the recording timer , or change any of the default hotkeys Game Bar uses to ones you prefer.
Not easy enough? Without even setting anything up you can just get in game and press Win+Alt+R and it will begin recording. You may see a toolbar appear, which means the recording has begun.
Press Win+Alt+R again and it will stop recording, and your video will be saved to your Videos/Captures folder by default. It will be saved as a .mp4 and from here you can do whatever you wish with your saved footage!
More from Softonic
9 best Windows 10 productivity tips and tricks
How to find out what data Windows 10 is storing about you
How to make Windows 10 run faster in 9 easy steps
Is this what the new Windows 10 version of WhatsApp will look like?


